Master Travel
Photography in Japan
Pro techniques, gear recommendations, and field-tested tips for capturing Japan's extraordinary visual landscape — from temples to typhoons.
The Power of Established Lines in Japan's Architecture
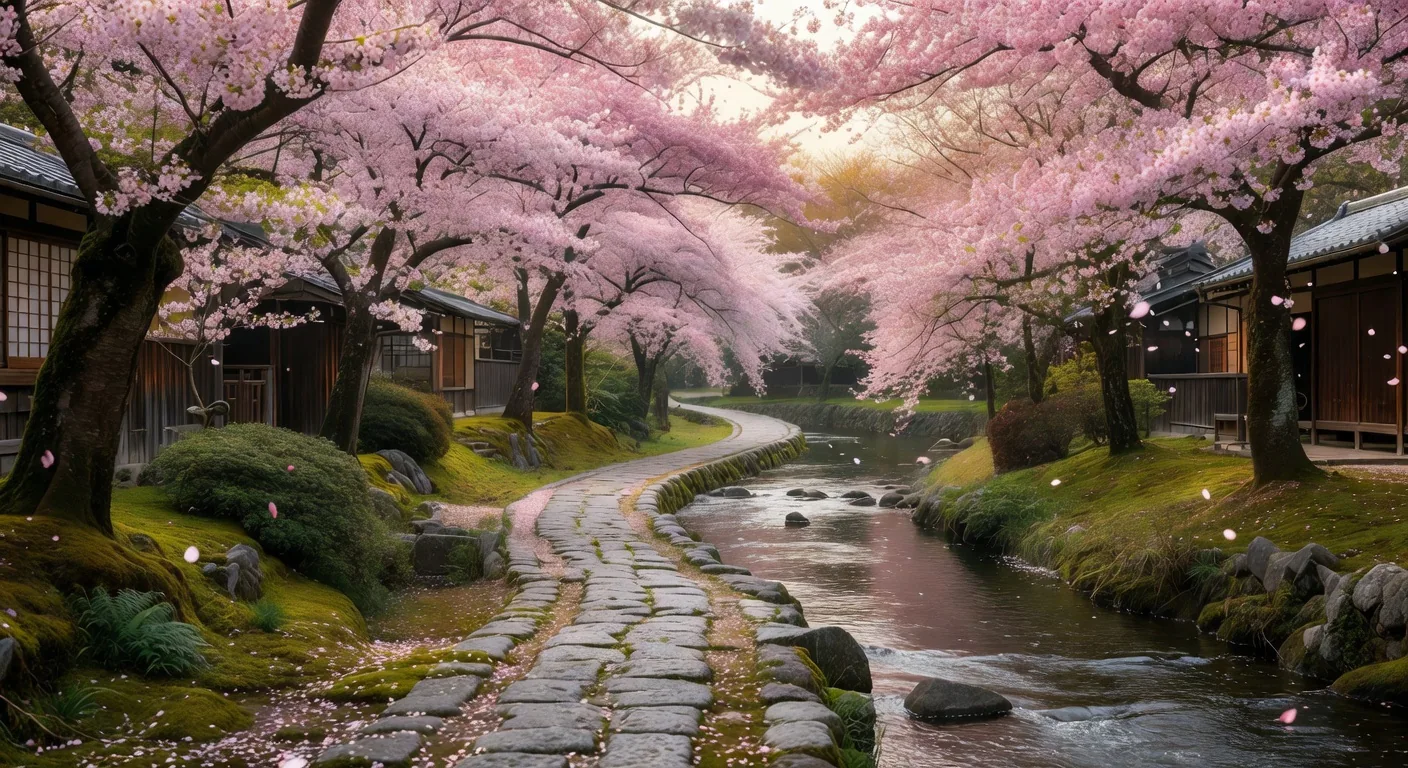
Japan's built environment is a compositional gift — torii gate tunnels, bamboo groves, temple corridors, canal-side paths, and staircase approaches all create powerful established lines that draw the viewer's eye deep into the frame.
The Philosopher's Path, lined with hundreds of cherry trees along a narrow canal, is a masterclass in naturally occurring established lines. Position yourself at the water's edge for a double-layered composition — the tree canopy above and its reflection below, framing a receding path into distant bokeh.
Pro Tip: Shoot at ground level (or even lower) to maximize the sense of depth. A 24mm or 35mm lens at f/5.6–f/8 will keep foreground to background acceptably sharp while retaining natural background blur on the canal path.
Frame Within a Frame
Japan's architecture is full of natural frames — torii gates, moon gates, shoji screens, and temple doorways. Position your subject within an architectural frame to create instant depth and draw focus to a distant element like a pagoda or mountain peak.
Negative Space & Ma
Japanese aesthetic philosophy embraces "ma" — the beauty of empty space. Don't always fill the frame. A lone torii rising from white mist, or a single maple branch against a clean grey sky, often says more than a cluttered composition.
Reflections & Symmetry
Japan's ponds, lakes, and moats provide mirror-perfect reflections. Get low to include as much water as possible. Pre-dawn and post-sunset windows offer the calmest water — even a gentle breeze destroys mirror reflections.
Golden Hour at Shrines
The warm orange light of golden hour transforms Japan's red-lacquered shrines and wooden temples. At Fushimi Inari, the torii gates glow like fire in late afternoon light — schedule your walk from the mountain top downward to catch the best angles.
Shooting in Rain & Mist
Don't pack away your camera when it rains — Japan's rainy season (June–July) creates extraordinarily atmospheric conditions. Wet stone paths, reflections in puddles, and mist curling around temple rooflines produce images that can't be replicated on clear days.
Night Photography & Blue Hour
The 20–30 minutes after sunset (blue hour) gives Japan's illuminated lanterns and neon signs a magical quality — the sky retains deep blue tones while artificial lights are perfectly exposed. Set ISO to 400–800 and shoot at f/4 on a stable surface.
Gear for Japan Photography
Tested recommendations for every situation — from bamboo forests to snowbound macaques.
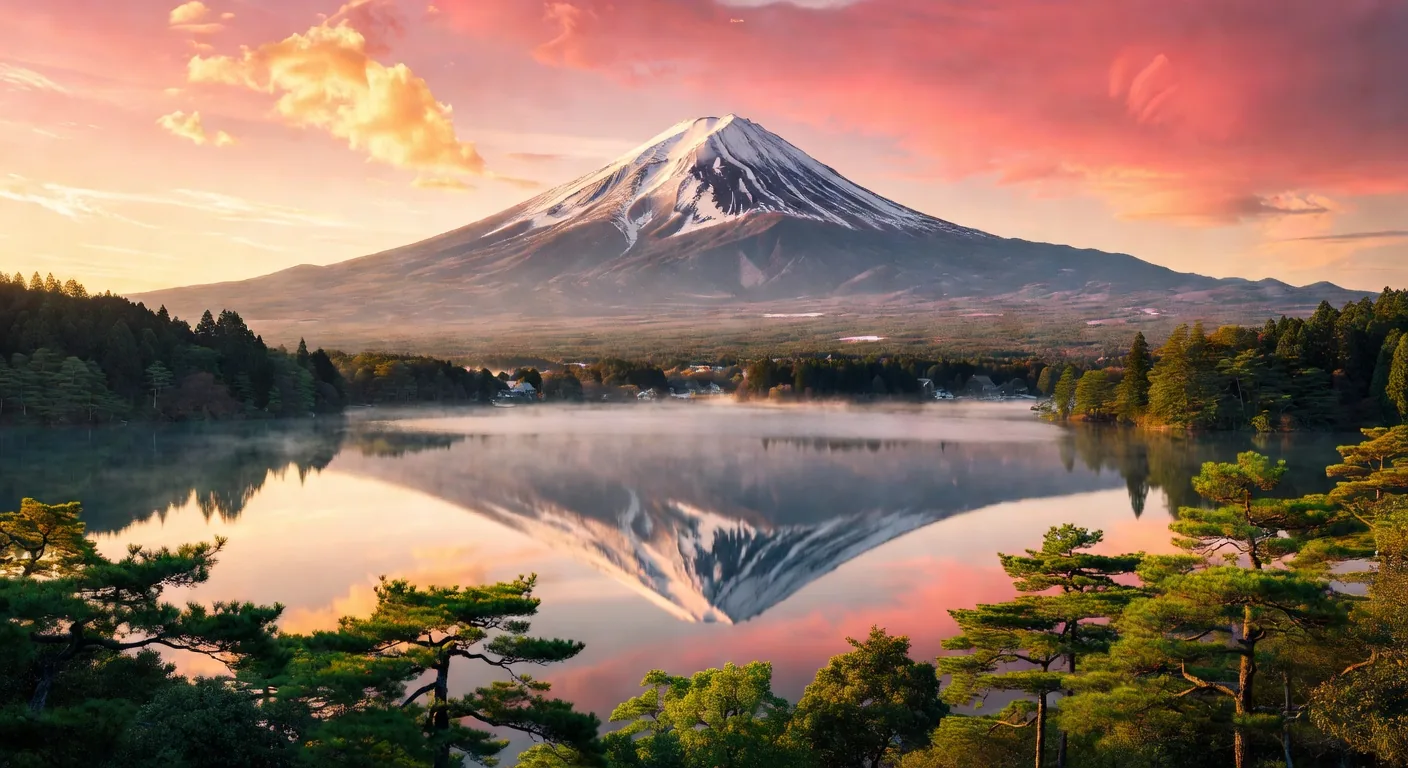
Shooting Mount Fuji Reflections
The definitive process for capturing Japan's most iconic photograph — from planning to post-processing.
Scout Your Position the Evening Before
Walk the north shore of Lake Kawaguchi at sunset to identify your exact shooting position. The Achi no Ura area near Kawaguchiko town offers the clearest Fuji views with a clean foreground of reeds and rocks for established lines.
Arrive 45 Minutes Before Sunrise
Set up your tripod in darkness. Use your phone to confirm Fuji's direction (it hides behind cloud or haze 60% of mornings — check the night before with webcams). The reflection forms before sunrise when there's zero wind.
Camera Settings for Dawn Reflection
Aperture: f/8 – f/11 (full depth of field)
Shutter: 1/4s – 2s (use LiveView for precision)
White Balance: Daylight 5500K
Format: RAW (essential for tonal range)
Focus: Manual, live-view magnified to peak on snow cap
Compose with the Rule of Thirds
Place the real Fuji summit on the upper third line and the reflected summit on the lower third. Leave the middle third as pure reflective water — this negative space amplifies the grandeur of the peak above.
Post-Processing: Enhance, Don't Fabricate
In Lightroom, lift shadows slightly to reveal foreground reed detail. Decrease highlights on the snow cap. Add a light graduated filter to deepen the sky. Avoid over-saturation — Japan's dawn palette is naturally muted and beautiful.
Photography Etiquette in Japan
Japan is a generous country for photographers — but cultural sensitivity ensures both great images and positive encounters.
Respect Shrine & Temple Rules
Many inner sanctuaries prohibit photography. Look for signs before shooting, and always ask before photographing priests or monks at prayer. A respectful nod often leads to unexpected access.
Photographing People
Always ask permission before photographing individuals, especially in traditional dress. A smile, gesture toward your camera, and eye contact conveys the request clearly across language barriers. Share your screen to show them the result.
Wildlife Guidelines
At Jigokudani, maintain distance from macaques — follow park rules (no feeding, no eye contact, keep 3m minimum). For Nara deer, stay calm and avoid sudden movements. Wildlife that trusts you yields better images anyway.
Drones: Special Permits Required
Drone flight near shrines, national parks, and urban areas requires pre-approval from authorities. Many iconic locations (Miyajima, Fushimi Inari, Hiroshima) are blanket no-fly zones. Always check regulations before travel.
Leave No Trace
Never bend, step on, or break branches for a better shot — particularly during sakura season when damage to blossoms causes significant distress. Japan's natural beauty has been maintained over centuries; help preserve it.
Traffic & Access Points
Never stand in roads, block pedestrian paths, or leave your tripod unattended in busy areas. At popular spots like Arashiyama, respect queuing systems during peak seasons and consider visiting during off-peak hours (5–7am).
Photography FAQ
Ready to Shoot Japan?
Explore our curated destination guides and find your perfect photography location across Japan's 47 prefectures.
Browse All Destinations ↗